Quick Setup of Explorer
Creation Methods
Explorer focuses on querying, filtering, and drilling down into detailed data. You can create one in the following three ways:
Create from Scratch: Customize charts, filter fields, and list display columns.
Create from Template: Built-in analysis templates for Log, APM, RUM, etc.
Create by Import: Supports JSON format for quick migration.
Create from Scratch
Choose this method when you need to fully customize the data type and analysis dimensions.
![]()
- Define the name for the current Explorer.
- Optionally enter a description for this Explorer.
- Select labels for easier grouping and management later.
- Select the data type for the current Explorer, including Log, APM, RUM, Profile.
- Select the visibility scope for the current Explorer.
- Confirm.
Visibility Scope
The visibility scope of an Explorer includes:
- Public: Accessible to all members within the workspace.
- Private: Only visible to the creator.
Note
A non-public Explorer shared via link is not visible to non-creators.
Create by Import
Reuse existing configurations or team-shared Explorer templates.
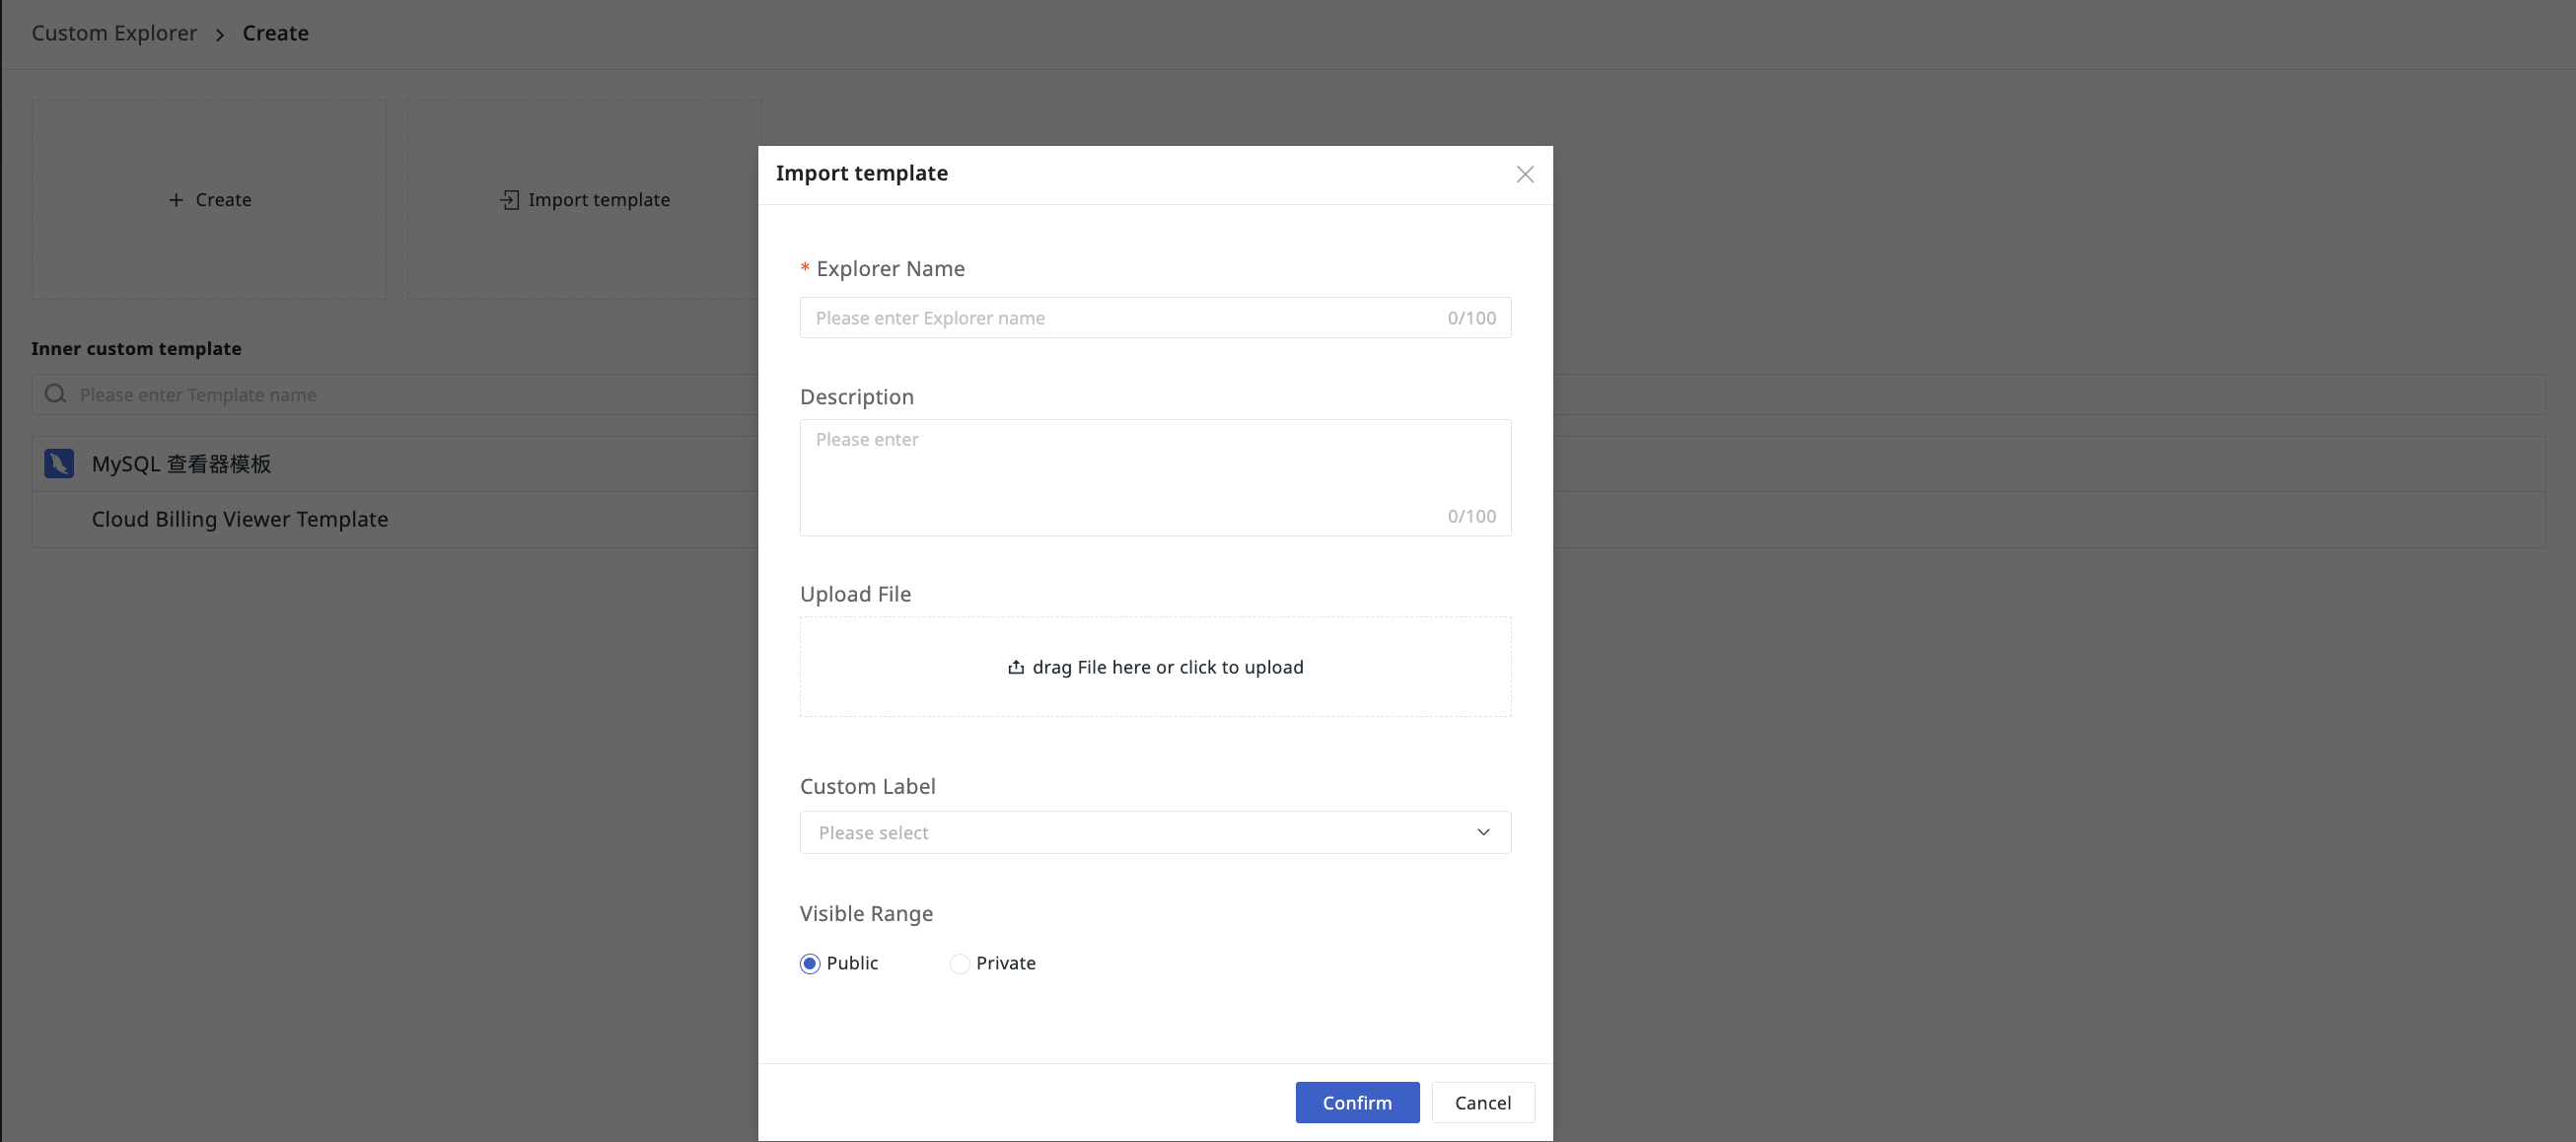
- Define the name for the current Explorer.
- Optionally enter a description for this Explorer.
- Upload a custom JSON file.
- Select labels for easier grouping and management later.
- Select the visibility scope for the current Explorer.
- Confirm.
Create from Template
Quickly create standard analysis views using built-in templates, no need to configure from scratch.
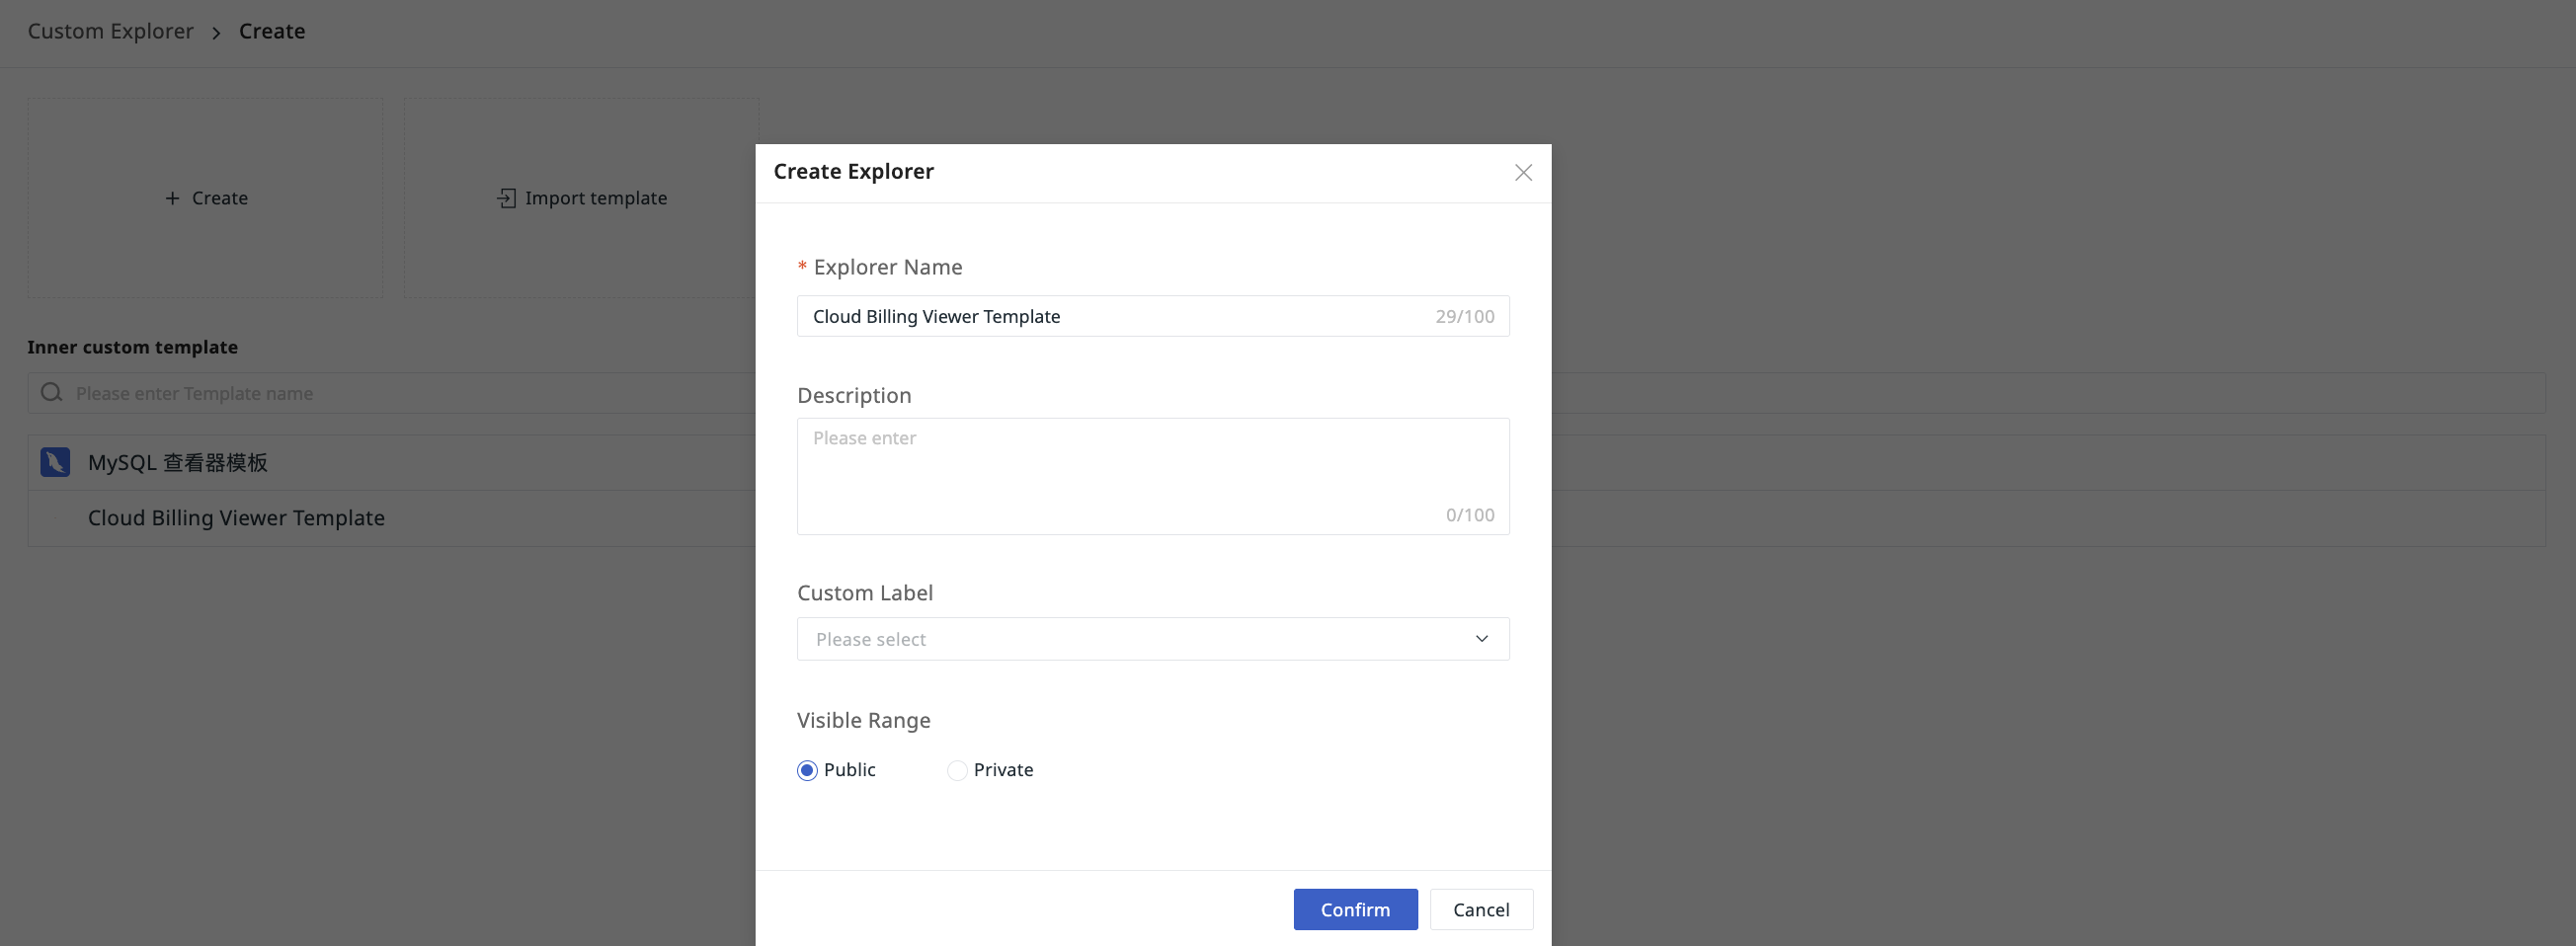
- The Explorer name defaults to the selected view's name and can be changed as needed.
- Optionally enter a description for this Explorer.
- Select labels for easier grouping and management later.
- Select the visibility scope for the current Explorer.
- Confirm.